Smart Project - Creating Scalable Smart Service (Delphi)
This tutorial will provide you with the steps needed to create your own Remoting Smart Service™, capable of serving your business logic via the standard mechanisms of SOAP over HTTP, while also exposing your service in a variety of other ways, including Remoting’ highly efficient BIN message format, and transferring data using the same ISAPI service project as a local dynamic link library.
See article Smart Project - Creating Scalable Smart Service (.NET) for the Delphi edition.
New Remoting ISAPI Service
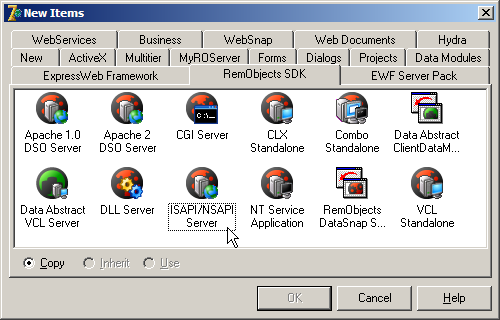
After starting Delphi, click on File -> New -> Other, which will open the New Project dialog. Select the Remoting SDK tab and then select the ISAPI/NSAPI Server Project (RODL-based) item:
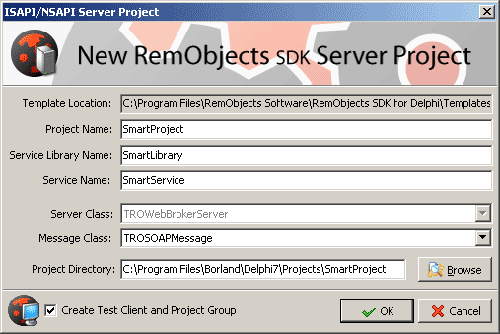
Click the OK button. You will now be prompted with the Remoting ISAPI/NSAPI Server Project settings dialog. Fill in the values below:
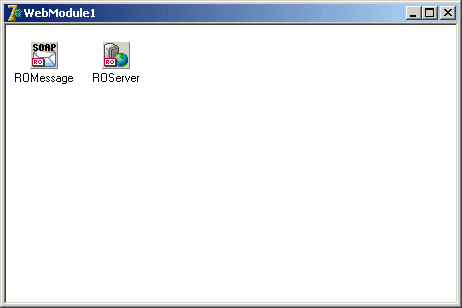
You will now be presented with your new Remoting service project – SmartProject. The project contains a single WebModule with a TROSOAPMessage and TROWebBrokerServer. This is the standard start of a Remoting ISAPI service:
Navigate the Delphi main menu to click Tools -> Remoting SDK -> Service Builder, which will display the Remoting Service Builder, an IDE for creating your Smart Service. This is where you will design your Remoting Services:
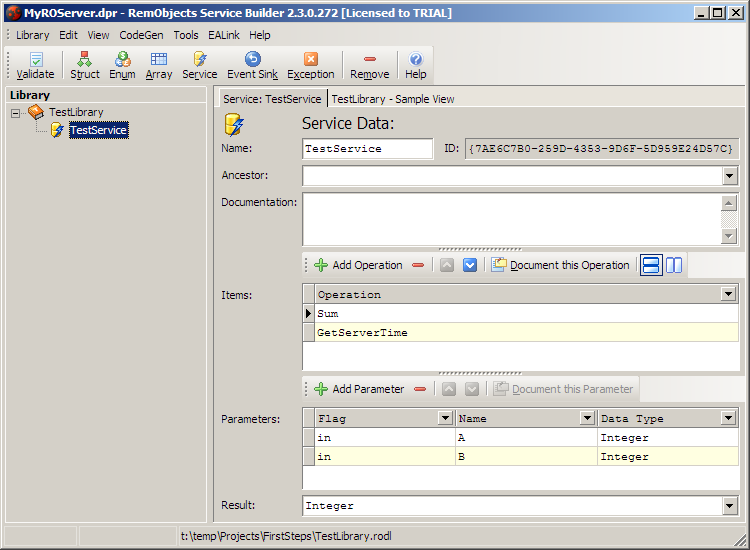
New Remoting Services come with two sample methods, Sum() and GetServerTime(), which we will be implementing in this tutorial.
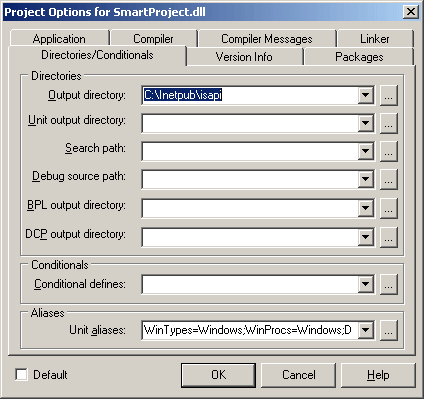
Now, navigate the Delphi main menu and click Project|Options. In the Project Options dialog, click the Directories/Conditionals tab and enter your ISAPI folder in the Output directory field. Click the OK button.
Assuming you already have OnCompile Helpers installed, click Project|OnCompile Helpers|COM+|Manage COM+ Applications.
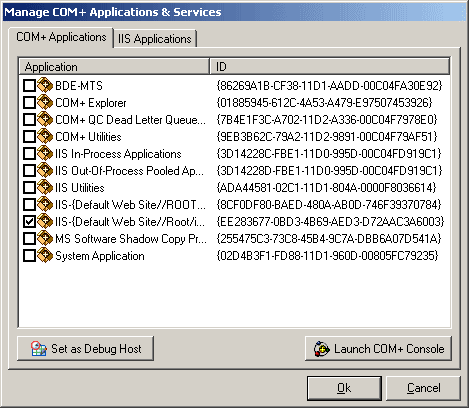
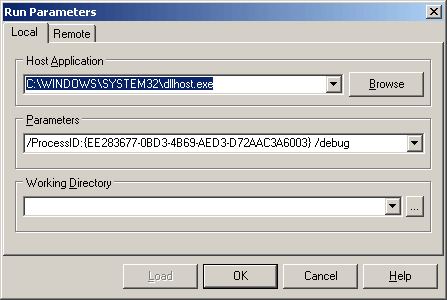
In the Manage COM+ Applications & Services dialog, select the COM application that corresponds with your ISAPI folder and click the Set as Debug Host button. This will display the Run Parameters dialog, populated with the values needed to run and debug your ISAPI Service within the Delphi IDE. Click the OK button.
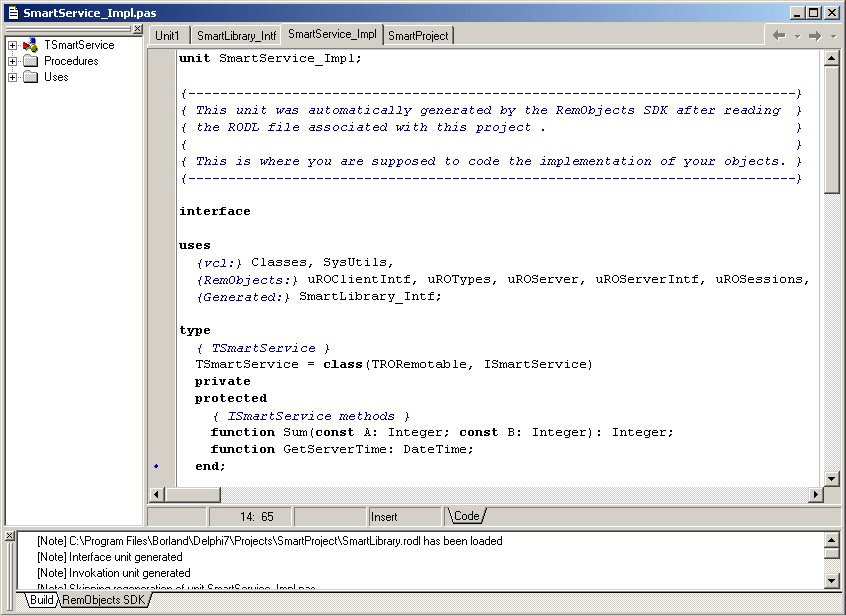
Click the Run toolbar button in the Delphi IDE. The Remoting precompiler will generate the necessary units for your Web Service (and regenerate those units, except for your implementation unit, whenever your service is recompiled):
You should now be able to open Internet Explorer and browse to your ISAPI Web Service. Mine, for instance, is accessible through http://localhost/isapi/SmartProject.dll/SOAP. This should show you the Web Service Description Language (WSDL) document for your new service.
Return to your project and open the implementation file for your project. This should be SmartService_Impl.pas. Add SysUtils to your uses clause and complete the implementation code for the Sum() and GetServerTime() methods (new code is represented in blue):
function TSmartService.Sum( const A: Integer; const B: Integer): Integer;
begin
  Result := A + B;
end ;

function TSmartService.GetServerTime: DateTime;
begin
  Result := Now;
end ;
Compile your service after completing these methods. You now have a fully functional standard Web Service, serving your logic over HTTP via SOAP.
Consuming your Web Service
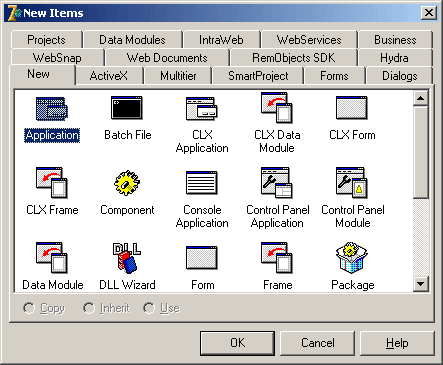
Right-click on your Project Group in the Project Manager and click the Add New Project menu item. Select the New tab and the Application item.
Click the OK button. Design your form similarly to the one below, including a TEdit, two TButtons, a TROSoapMessage, and a TROWinInetHTTPChannel. The soap message component will be used to communicate with our Web Service and the WinInet channel is one of many HTTP channels provided out of the box with Remoting (WinInet is Windows specific, but also more flexible than the other HTTP channels).

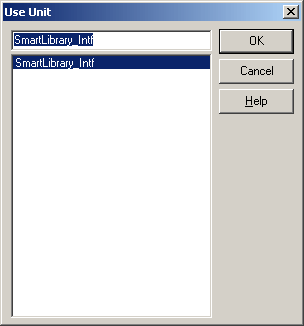
Right-click on your new Application in the Project Manager and click the Add menu item. Select the interface source file from your service. This should be SmartLibrary_Intf.pas. You could also generate this file via your service's published WSDL document using Remoting' Service Importer, but this solution is easiest when you are authoring both the service and the client. Hit the ALT+F11 keys, which will display the Use Unit dialog. Add the SmartLibrary_Intf unit to your uses and click the OK button:
Add the following event handlers for the Add and Get Time buttons:
procedure TForm2.Button1Click(Sender: TObject);
 begin
   ROWinInetHTTPChannel1.TargetURL := Edit1.Text;
   with CoSmartService.Create(ROSOAPMessage1, ROWinInetHTTPChannel1) do
     ShowMessage(IntToStr(Sum(1, 2)));
 end  ;
procedure TForm2.Button2Click(Sender: TObject);
 begin
     ROWinInetHTTPChannel1.TargetURL := Edit1.Text;
   with CoSmartService.Create(ROSOAPMessage1, ROWinInetHTTPChannel1) do
     ShowMessage(DateTimeToStr(GetServerTime));
 end ;
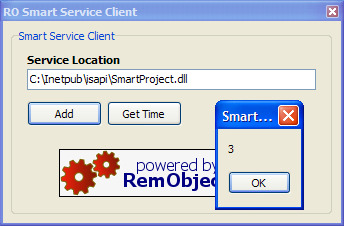
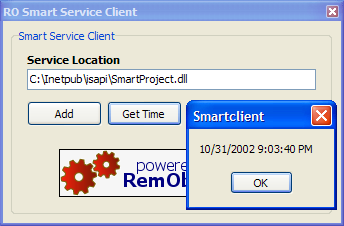
Now, run your client application. Put the address of your Web Service in the edit box, and try the Add and Get Time buttons.
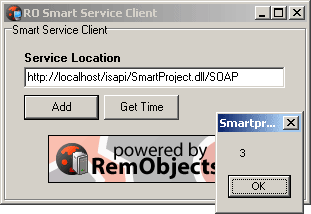
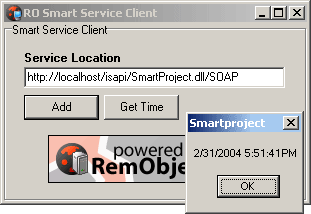
We now have a fully functional client for our Web Service.
Scaling your Web Service to a Smart Service™
While our Web Service works quite well, Remoting comes with out of the box components that allow you to scale your Web Service to support, along with SOAP, a highly efficient BIN messaging protocol. The BIN protocol supports both encryption and compression and results in up to 80 compression over standard SOAP. A Smart Service can support both SOAP and BIN messaging protocols very easily. Let's see how:
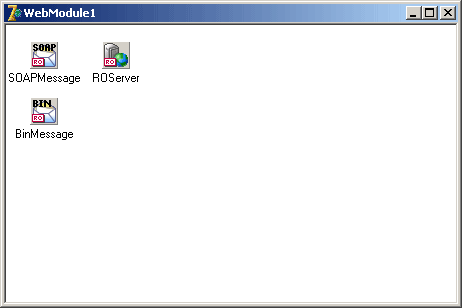
In the Project Manager, activate your SmartProject service project. Activate your WebModule and add a TROBinMessage, renaming your components as shown below (for readability):
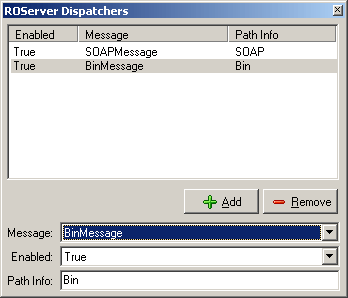
Click the button in the Dispatchers property editor for the ROServer component. This dialog displays the message dispatchers for the current RO Server object. You should already see one entry for your SOAPMessage component.The Path Info field indicates the trailing URL path associated with the given RO Message object. If you recall, we’ve been accessing our Web Service through http://localhost/isapi/SmartProject.dll/SOAP (or similar), which has told our RO Server object to use the ROSOAPMessage object to handle message parsing. Click the Add button and select the BINMessage component in the Message combo box. The dialog will automatically fill in your Path Info text box with BIN, but you may edit this if you desire.
Now, simply recompile your SmartProject service. Your Web Service is now a Smart Service™, ready to serve clients via either the standard SOAP over HTTP or the more efficient BIN over HTTP for Remoting enabled clients.
Consuming your Smart Service™
In the Delphi Project Manager, activate your client application. Activate your main form, and remove the SOAP Message component. Click File|New|Unit, save the unit as ROFuncs.pas and fill in the code below. Note that this is simply providing a function to generate an RO Message object, either SOAP or BIN, depending on the Location parameter:
unit ROFuncs;
interface
uses uROClient, uROProxy;
function GetMessage(Location: string ): TROMessage;
implementation
uses SysUtils, uROBINMessage, uROSOAPMessage, Classes;
function GetMessage(Location: string ): TROMessage;
 begin
   if (Length(Location) > 3) and
     (UpperCase(Copy(Location, Length(Location) - 3, 4)) = '/BIN') then
   begin
     Result := TROBINMessage.Create( nil );
     TROBINMessage(Result).UseCompression := True;
   end else
   begin
     Result := TROSOAPMessage.Create(TComponent( nil ));
   end ;
 end ;
end ;
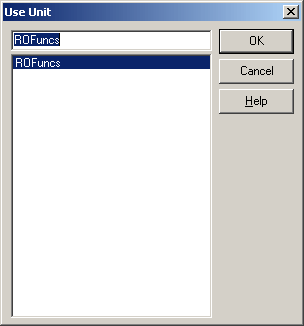
Activate your main form and hit ALT+F11 to display the Use Unit dialog. Add the ROFuncs file to your uses and click the OK button.
Now, alter the event handlers for your buttons as shown below (new code is represented in blue):
procedure TForm2.Button1Click(Sender: TObject);
var
  ROMsg: TROMessage;
begin
  ROWinInetHTTPChannel1.TargetURL := Edit1.Text;
  ROMsg := GetMessage(Edit1.Text);
  try
    with CoSmartService.Create(ROMsg, ROWinInetHTTPChannel1) do
       ShowMessage(IntToStr(Sum(1, 2)));
  finally
    ROMsg.Free;
  end;
end ;

procedure TForm2.Button2Click(Sender: TObject);
var
  ROMsg: TROMessage;
begin
  ROWinInetHTTPChannel1.TargetURL := Edit1.Text;
  ROMsg := GetMessage(Edit1.Text);
  try
    with CoSmartService.Create(ROMsg, ROWinInetHTTPChannel1) do
      ShowMessage(DateTimeToStr(GetServerTime));
  finally
    ROMsg.Free;
  end;
end ;
Compile and run your application. Now, for your service location, you can either indicate a trailing /SOAP to access your Smart Service via the SOAP protocol, or /BIN to access it via the BIN message protocol. Remoting seamlessly takes care of the rest.
Scaling back your Smart Service™
Having a central service for business logic is essential in today's business world. However, the technical market is far from shunning the need to have a local application. While more and more people are equipped with Internet connections, many clients still require a local solution. Remoting Smart Services can fill this gap, too, with only a few lines of code. This means that you can use the exact same code base for your ISAPI Smart Service, your local dynamic link library Smart Service, and your standards-compliant SOAP Web Service. They are all the same file.
Remoting has a built-in wizard for creating a local link library service as easily as our ISAPI service. However, because we want to adapt our existing ISAPI service to function as a local service as well, we need to add a few lines of code to our SmartProject. In the Delphi Project Manager, activate your SmartProject service. Right click on the SmartProject.dll project node and click the View Source menu item. Add uRODLLServer, uROBINMessage and Windows to your project's uses clause. Add the following code (new code is represented in blue):
var BINMessage : TROBINMessage;

procedure ROProc(Reason:integer);
begin
  case Reason of
    DLL_PROCESS_ATTACH: begin
      BINMessage := TROBINMessage.Create( NIL );
      RegisterMessage(BINMessage);
    end ;
    DLL_PROCESS_DETACH: begin
      BINMessage.Free;
    end ;
  end ;
end ;

exports
  GetExtensionVersion,
  HttpExtensionProc,
  TerminateExtension;

begin
  DLLProc:=@ROProc;
  ROProc(DLL_PROCESS_ATTACH);
  CoInitFlags := COINIT_MULTITHREADED;
  Application.Initialize;
  Application.CreateForm(TMainModule, MainModule);
  Application.Run;
end .
Recompile your service. Your service is now ready to serve either via HTTP or as a local dynamic link library. Let's expand on our client application and try it out.
Consuming a local Smart Service™ Library
In the Delphi Project Manager, activate your client application project. Open the RUFuncs.pas file in the Delphi editor. Add uROWinInetHTTPChannel and uRODLLChannel to the ROFuncs uses clause. Add the following GetChannel() function and alter the existing GetMessage() function, as shown below:
function GetChannel(Location: string ): TROTransportChannel;

function GetMessage(Location: string ): TROMessage;

implementation

uses uROWinInetHTTPChannel, uRODLLChannel, SysUtils, uROBINMessage, uROSOAPMessage, Classes ;

function GetChannel(Location: string ): TROTransportChannel;
begin
  if (FileExists(Location)) and (UpperCase(ExtractFileExt(Location)) = '.DLL') then
  begin
    Result := TRODLLChannel.Create( nil );
    TRODLLChannel(Result).DLLName := Location;
  end else
  begin
    Result := TROWinInetHTTPChannel.Create( nil );
    TROWinInetHTTPChannel(Result).TargetURL := Location;
  end ;
end ;

function GetMessage(Location: string ): TROMessage;
begin
  if (FileExists(Location)) and (UpperCase(ExtractFileExt(Location)) = '.DLL') then
  begin
    Result := TROBINMessage.Create( nil );
    TROBINMessage(Result).UseCompression := True;
  end else
  begin
    if (Length(Location) > 3) and
      (UpperCase(Copy(Location, Length(Location) - 3, 4)) = '/BIN') then
    begin
      Result := TROBINMessage.Create( nil );
      TROBINMessage(Result).UseCompression := True;
    end else
    begin
      Result := TROSOAPMessage.Create(TComponent( nil ));
    end;
  end;
end;
Now we have a function that will return an RO Channel object depending on the Location parameter, and we have adapted our GetMessage() function to check if a local library file is passed as the Location parameter. Activate your main form and remove the WinInet Channel component. Alter your event handlers as follows:
procedure TForm2.Button1Click(Sender: TObject);
var
  ROMsg: TROMessage;
  ROChannel: TROTransportChannel;
begin
  ROMsg := GetMessage(Edit1.Text);
  ROChannel := GetChannel(Edit1.Text);
  try
    with CoSmartService.Create(ROMsg, ROChannel) do
      ShowMessage(IntToStr(Sum(1, 2)));
  finally
    ROMsg.Free;
    ROChannel.Free;
  end;
end;

procedure TForm2.Button2Click(Sender: TObject);
var
  ROMsg: TROMessage;
  ROChannel: TROTransportChannel;
begin
  ROMsg := GetMessage(Edit1.Text);
  ROChannel := GetChannel(Edit1.Text);
  try
    with CoSmartService.Create(ROMsg, ROChannel) do
      ShowMessage(DateTimeToStr(GetServerTime));
  finally
    ROMsg.Free;
    ROChannel.Free;
  end;
end;
We have simply altered our event handlers to use our new GetChannel() method to retrieve an appropriate RO Channel object for our given location. Run the program and try it.
Simply Scalable
As you've seen, Remoting SDK enables you to serve your business objects from anywhere, scaling from a local library to a standard Web Service or a highly efficient Smart Service™, all with just a few lines of code. Creating a truly scalable framework for your applications has never been easier.