How to write a Server (Delphi)
This article shows how to create your first server using the Remoting SDK (Delphi edition). Having read this article, you will probably want to continue with its companion: How to write a Remoting SDK Client (Delphi).
Note: if you are also interested in the .NET version of these articles, see How to write a Remoting SDK Server (.NET) and How to write a Remoting SDK Client (.NET).
There is also How to write a Remoting SDK Client (JavaScript).
You may use this article as a tutorial and so all steps you need to take are presented as bullet points. The source code for the completed project is attached to this article - see the link at the bottom.
Selecting the server type
The first step is to select the server type you want to create.
- From the Delphi IDE, click on
File -> New -> Otherand switch to the Remoting SDK tab.
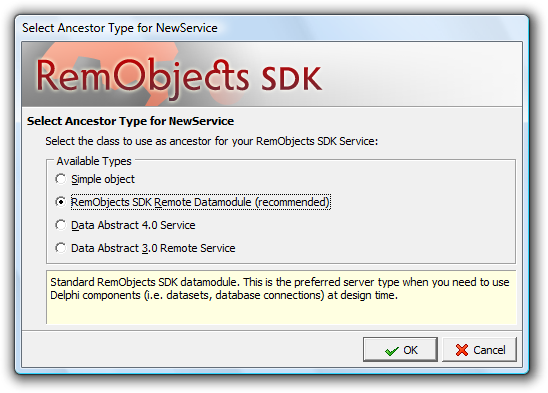
This is what you will be presented with (may differ, of course, depending on your Delphi and Windows version):
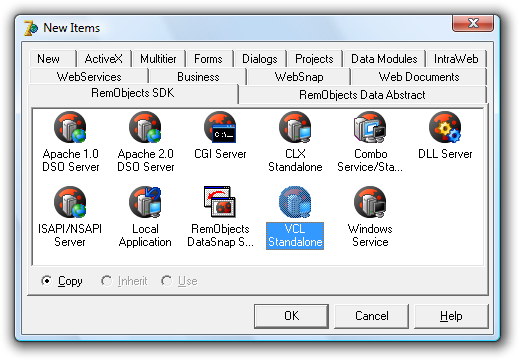
In this example we will create a simple VCL Standalone Executable Server. This is the simplest type of server that you can create and it does not require any web server or additional configuration to run.
- Select
VCL Standaloneand click OK.
Selecting the project options
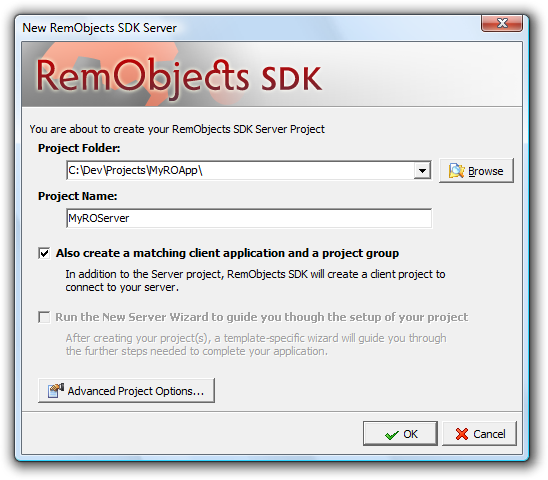
The following dialog will allow you to enter basic options such as the name of your project and the project's path.
- Set
Project FolderandProject Nameas shown below (obviously you can choose other values if you prefer) :
Notes:
New Server Wizard checkbox: this dialog can also be displayed when running templates using our Data Abstract product. At that time, the second checkbox is checked and enabled, providing control over the Data Abstract Server Wizard. When run directly from the Remoting SDK, the checkbox is always disabled.Advanced Project Options: allows fine tuning of the generated code. The most usual items you may wish to change areService Library Name(default = NewLibrary) andServer Class(NewService). If your service is being called by non-RO clients, you will also want to changeMessage Classto use SOAP, XML-RPC or PostMessage (the default is our efficient BinMessage).
For the purposes of this tutorial, we will keep it simple and accept the defaults for Advanced Project Options.
- Uncheck
Also create a matching client application and a project group
Normally, you will want this option checked to create a client application too, but you will need to know how to do these simple steps yourself for creating additional clients. Accordingly, we show this separately in the How to write a Remoting SDK Client (Delphi) article.
- Click
OK, which will create the server project.
Activate your server
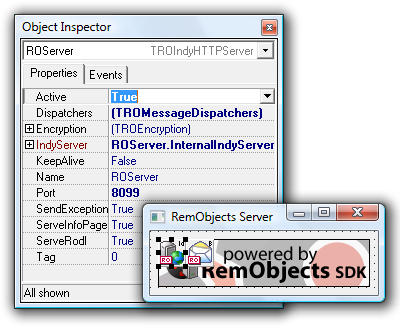
Your project is now created and the main form is displayed inside the Delphi IDE. On top of the form you will see two components which correspond to the Server Class and Message Class that we selected in the previous dialog.
- Click on the
ROServercomponent and set its Active property to TRUE.
Tip: the wizard has linked the server and message components for you by adding an entry into the ROServer component's Dispatchers collection. If you add a different message component to this form, make sure to add a Dispatcher item to ROServer to link to it:
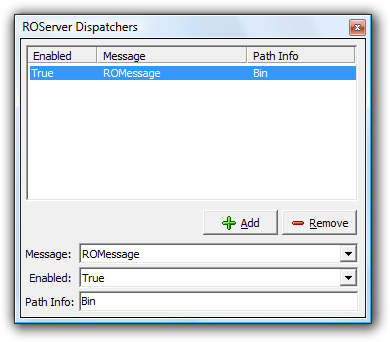
For more information about the available message types, see Smart Services.
- Hit
Ctrl-F9to compile your project.
The Remoting SDK CodeGen
Immediately after hitting F9, a dialog is presented, thus allowing you to select the facilities already provided by the service.
Notes:
- if you have Hydra installed, you will see an additional type available:
Hydra Autoupdate Service. - the last two options are only displayed if you have Data Abstract installed.
- Click
OKand the compilation will continue.
Once this is done, the project will contain new units (see below) and a small window will be displayed at the bottom of your screen (in Delphi 6), or CodeGen messages will appear in your Message pane (Delphi 7 onwards).
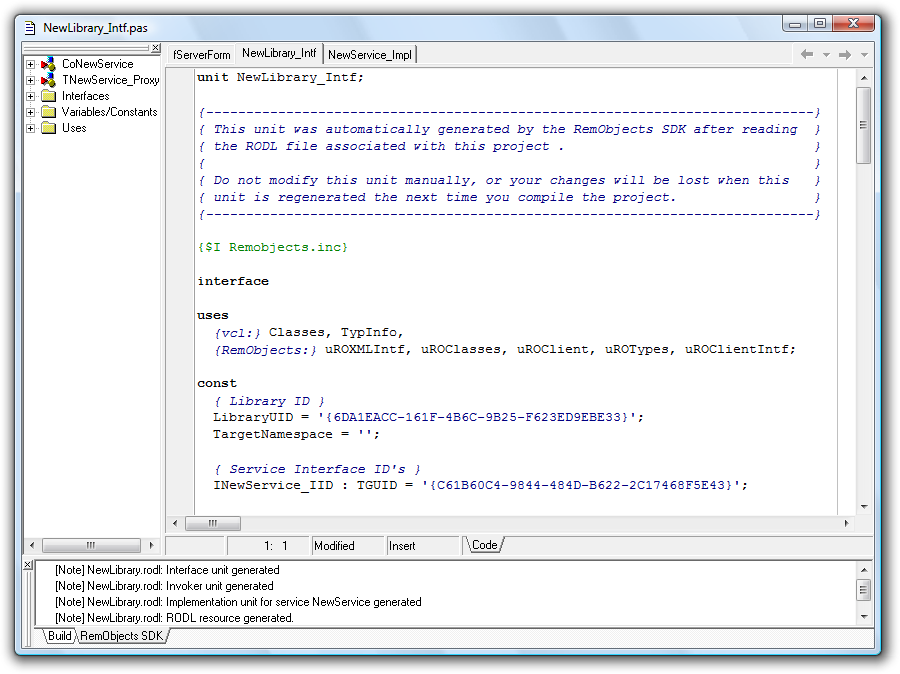
Behind the scenes, the Remoting SDK preprocessor has analyzed the NewLibrary.rodl file (generated when the project was first created). The preprocessor found a definition of a service for which there was no implementation unit and then created it.
You will see that three files have been generated:
NewLibrary_Invk.pas: contains all the internal 'plumbing'. It is regenerated each time you compile and is used by the server only.NewLibrary_Intf.pas: the service interface used by the server and clients. Again, this is auto-regenerated as needed and any changes you make would be lost.-
NewService_Impl.pas: contains the service implementation and is where you place your code. Unlike the other two files, this file does not get regenerated. If you update the service (e.g. via theTools -> Remoting SDK -> Edit Service Librarymenu item, as shown later) and then compile, you will get errors related to missing method(s). Simply add their interface declarations to the class and hitCtrl+Shift+Cto add implementation stubs for you to complete. -
Select the
NewService_Impl.pasunit and provide the following implementation for the Sum and GetServerTime test methods:
function TNewService.Sum(const A: Integer; const B: Integer): Integer;
begin
  result := A + B;
end;

function TNewService.GetServerTime: DateTime;
begin
  result := Now;
end;
- Hit
F9(or select theTools -> Remoting SDK -> Launch Server Executablemenu item) to launch your server.
Testing the server
Now that your server is running, it's time to check if it's working.
Open Internet Explorer (or any other browser) and type in the following URL: http://localhost:8099/Bin
You will see the following XML document displayed:
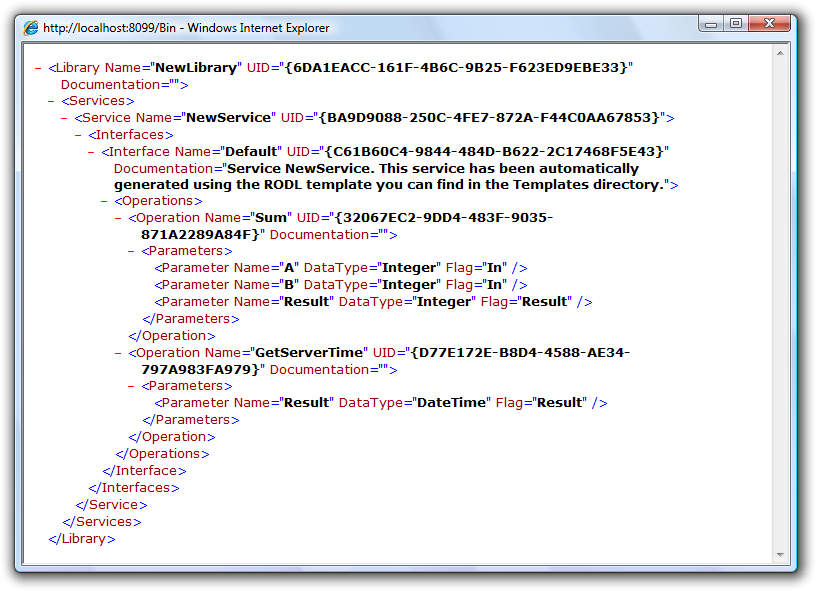
This is it! The server is successfully running and ready to be used by Remoting SDK clients. The only code we had to write was for our actual services.
Note: if your browser did not display the XML document shown in the screenshot above, it is either because you did not set the property ROServer.Active to TRUE or because you typed the wrong URL.
Additional
If you open your project directory, you will see the NewLibrary.rodl file, which you will maintain via the supplied Service Builder tool.
- From inside Delphi, click on
Tools -> Remoting SDK -> Service Builder.
The Remoting SDK Service Builder will now be launched and the NewLibrary.rodl file will be open.
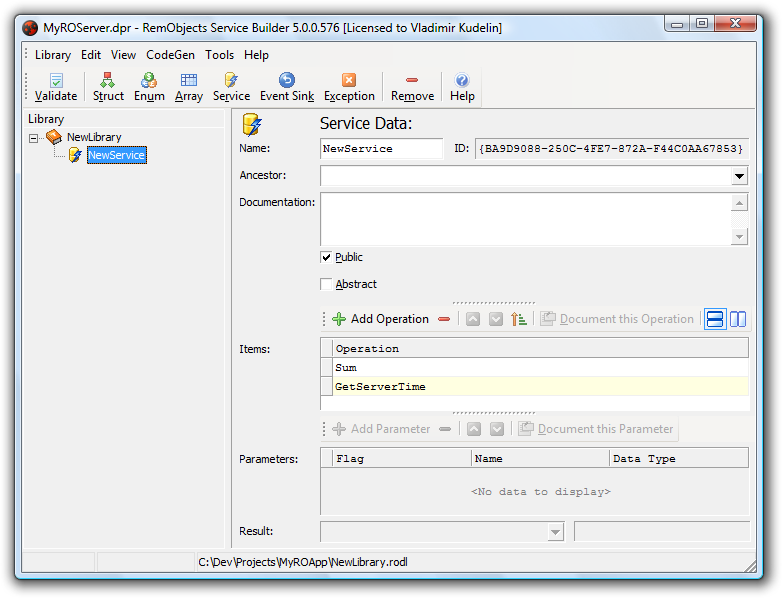
This tool is all you need to add methods to your service and modify the NewLibrary.rodl file. The Sum and GetServer time methods are the default methods that are added to each first service of all your RO Server projects.
Tip: these methods were added in the early days of the Remoting SDK as examples to help newcomers get started and they are still used by some of the simpler samples. You may want to change this behavior, which is very simple: in Windows Explorer, navigate to the ..\RemObjects SDK for Delphi\Templates folder and double-click on the $svclibname.rodl file. This will invoke the Service Builder, where you will be able to delete the two methods.
You are now ready to create a client to access this service, see How to write a Remoting SDK Client (Delphi) article.
Enabling JavaScript Access on the Server
Drop the TROJavaScriptHttpDispatcher component onto the server form or data module, and connect its Server property to your server channel component. Please pay attention to the default values of its properties: DefaultFile=index.html, Folder=.\html and Path=/js/ - we'll see these values later.
Note:
The TROJavaScriptHttpDispatcher turns your RemObjects server into a web server, but nothing prevents you from putting your application and library files to any other web server. In this case just enable cross-origin access (CORS) support at the server by setting its SendCrossOriginHeader property to true and handling OnSendCrossOriginHeader or OnSendCrossOriginHeaderEx events, if needed (by default it sends *, which allows access for every domain).
If you are using JSONMessage, set its WrapResult, its IncludeTypeName, its SessionIdAsId and its SendExtendedException properties to true.
The server is ready, now to How to write a Remoting SDK Client (JavaScript).